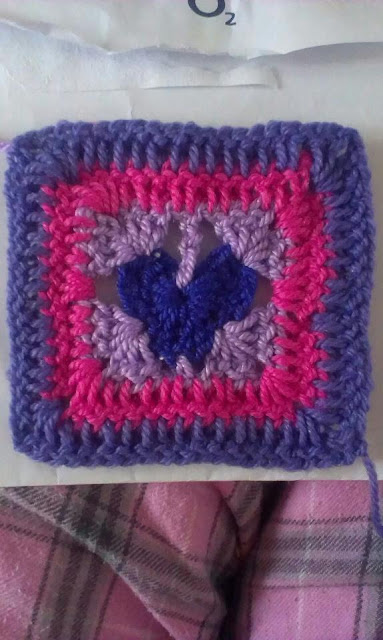
I'm making squares for a blanket I hope to auction and raise money for Epilepsy Research UK.
When the following link (
http://www.molliemakes.com/projects/how-to-make-a-crochet-heart-granny-square/ opens in a new window) appeared in my facebook news feed this morning I got a little excited, imagining it in purples.
I'm not a big fan of the traditional granny square, preferring solid
granny squares, so I adapted it a little and came up with the following
square
Not a BAD effort, but I didn't like the way the original heart was a little distorted.
So I went to work creating my own version.
Normally I'd use back loops only (blo) on the heart, but I was using a REALLY soft yarn, so the loops were pulling quite badly if I added the 3+ stitches in only the BL (see picture of my initial effort).
Just for fun I thought I'd share my own version of a granny heart square.
All instructions are in US terms and the beginning chains count as a DC.
The pattern assumes you already have the heart made from this pattern here:
http://howtocrochetaheart.blogspot.com.au/2012/07/how-to-crochet-heart-in-one-round.html
1. Attach to top left hand side of heart.
This should be in the stitch just after the ch3 from the original heart.
2. ch3 2DC in same sp, ch2
3. sk 3 st, dc x 2 ch2 dc x3 in same st
4. ch 1, sc in tr at heart point, ch 1
Your heart should look like the above photo at this point.
5. sk 2 st, 3 dc ch2 3 dc in next st
6. sk 3 st, 3 dc ch 2 3 dc in top right hand side of the heart (stitch next to ch3 from original heart)
7. ch 1 then tr into centre of heart, ch 1
8. 3dc into beg st, ch2 sl st to top of ch3 secure yarn and end colour
My heart square looked like this at the end of stage 1.
1. Attach new colour to any corner, ch 3, dc in same sp, dc in next 3 st, dc in ch1 sp, dc in tr, dc in ch1 sp, dc in next 3 st,
2. 2dc, ch 2, 2dc in ch2 sp (corner made)
3. dc in next 3 st, 3dc in ch2 sp, dc in next 3st
4. 2 dc, ch 2, 2dc in ch2 sp (corner made)
5. dc in next 3 st, dc in ch1 sp, dc in sc, dc in ch1 sp, dc in next 3 st
6. 2 dc, ch2, 2 dc in ch2 sp (corner made)
7. dc in next 3 st, 3 dc in ch2 sp, 3 dc in next 3 st,
8. 2 dc in ch2 sp, ch 2, attach to top of ch3, tie off (corner made)
At the end of stage 2 my heart square looked like above.
From this point, to make the square larger, just continue as you would for a normal solid Granny Square -DC in each stitch across with 2dc, ch2, 2dc in each corner.


